Showing: 7 - 9 of 9 RESULTS

cozy minimalist – master bedroom

diy headboard

I’m doing something surprising. I’m taking an online design course. What?! Yep. Me, doing something for myself. ??? Why not ya’ll? And yes, I realize that I’m already a designer. But it’s always good to stretch yourself a bit and to be open to learning new ways of doing things. Plus, I never do things for myself. I take on projects for friend’s nurseries and kitchens and never…and I mean NEVER…finish my own spaces. I think I get designer block because I love a million different styles, and get caught up designing and redesigning and then never end up doing anything. So I leave things as is. I don’t add to them. I don’t accessorize. I wait. And a year later…I’m still there. Using old and unwanted furniture that doesn’t belong in the spot it’s in, but that I have dreams for.


For instance, there were two or three quirky lamps and little tables in this house when we moved in. Now they’re being used as our night stands and lighting in our master bedroom, and they just don’t belong. Like at all. I have ideas for them of course. To paint and repurpose…along with a million other things I collect and stash away in corners of rooms, and our basement, and our barn. {sigh}


Our house is basically a blank canvas. Every room was painted white by the previous homeowners, probably to help it sell. And I LOVE it. There’s just something about a classic white backdrop that makes me feel happy. But my hubby has commented on it, more than once, and I guess that man needs color. So I know a few rooms will get a splash of something eventually. If I can ever make a decision.


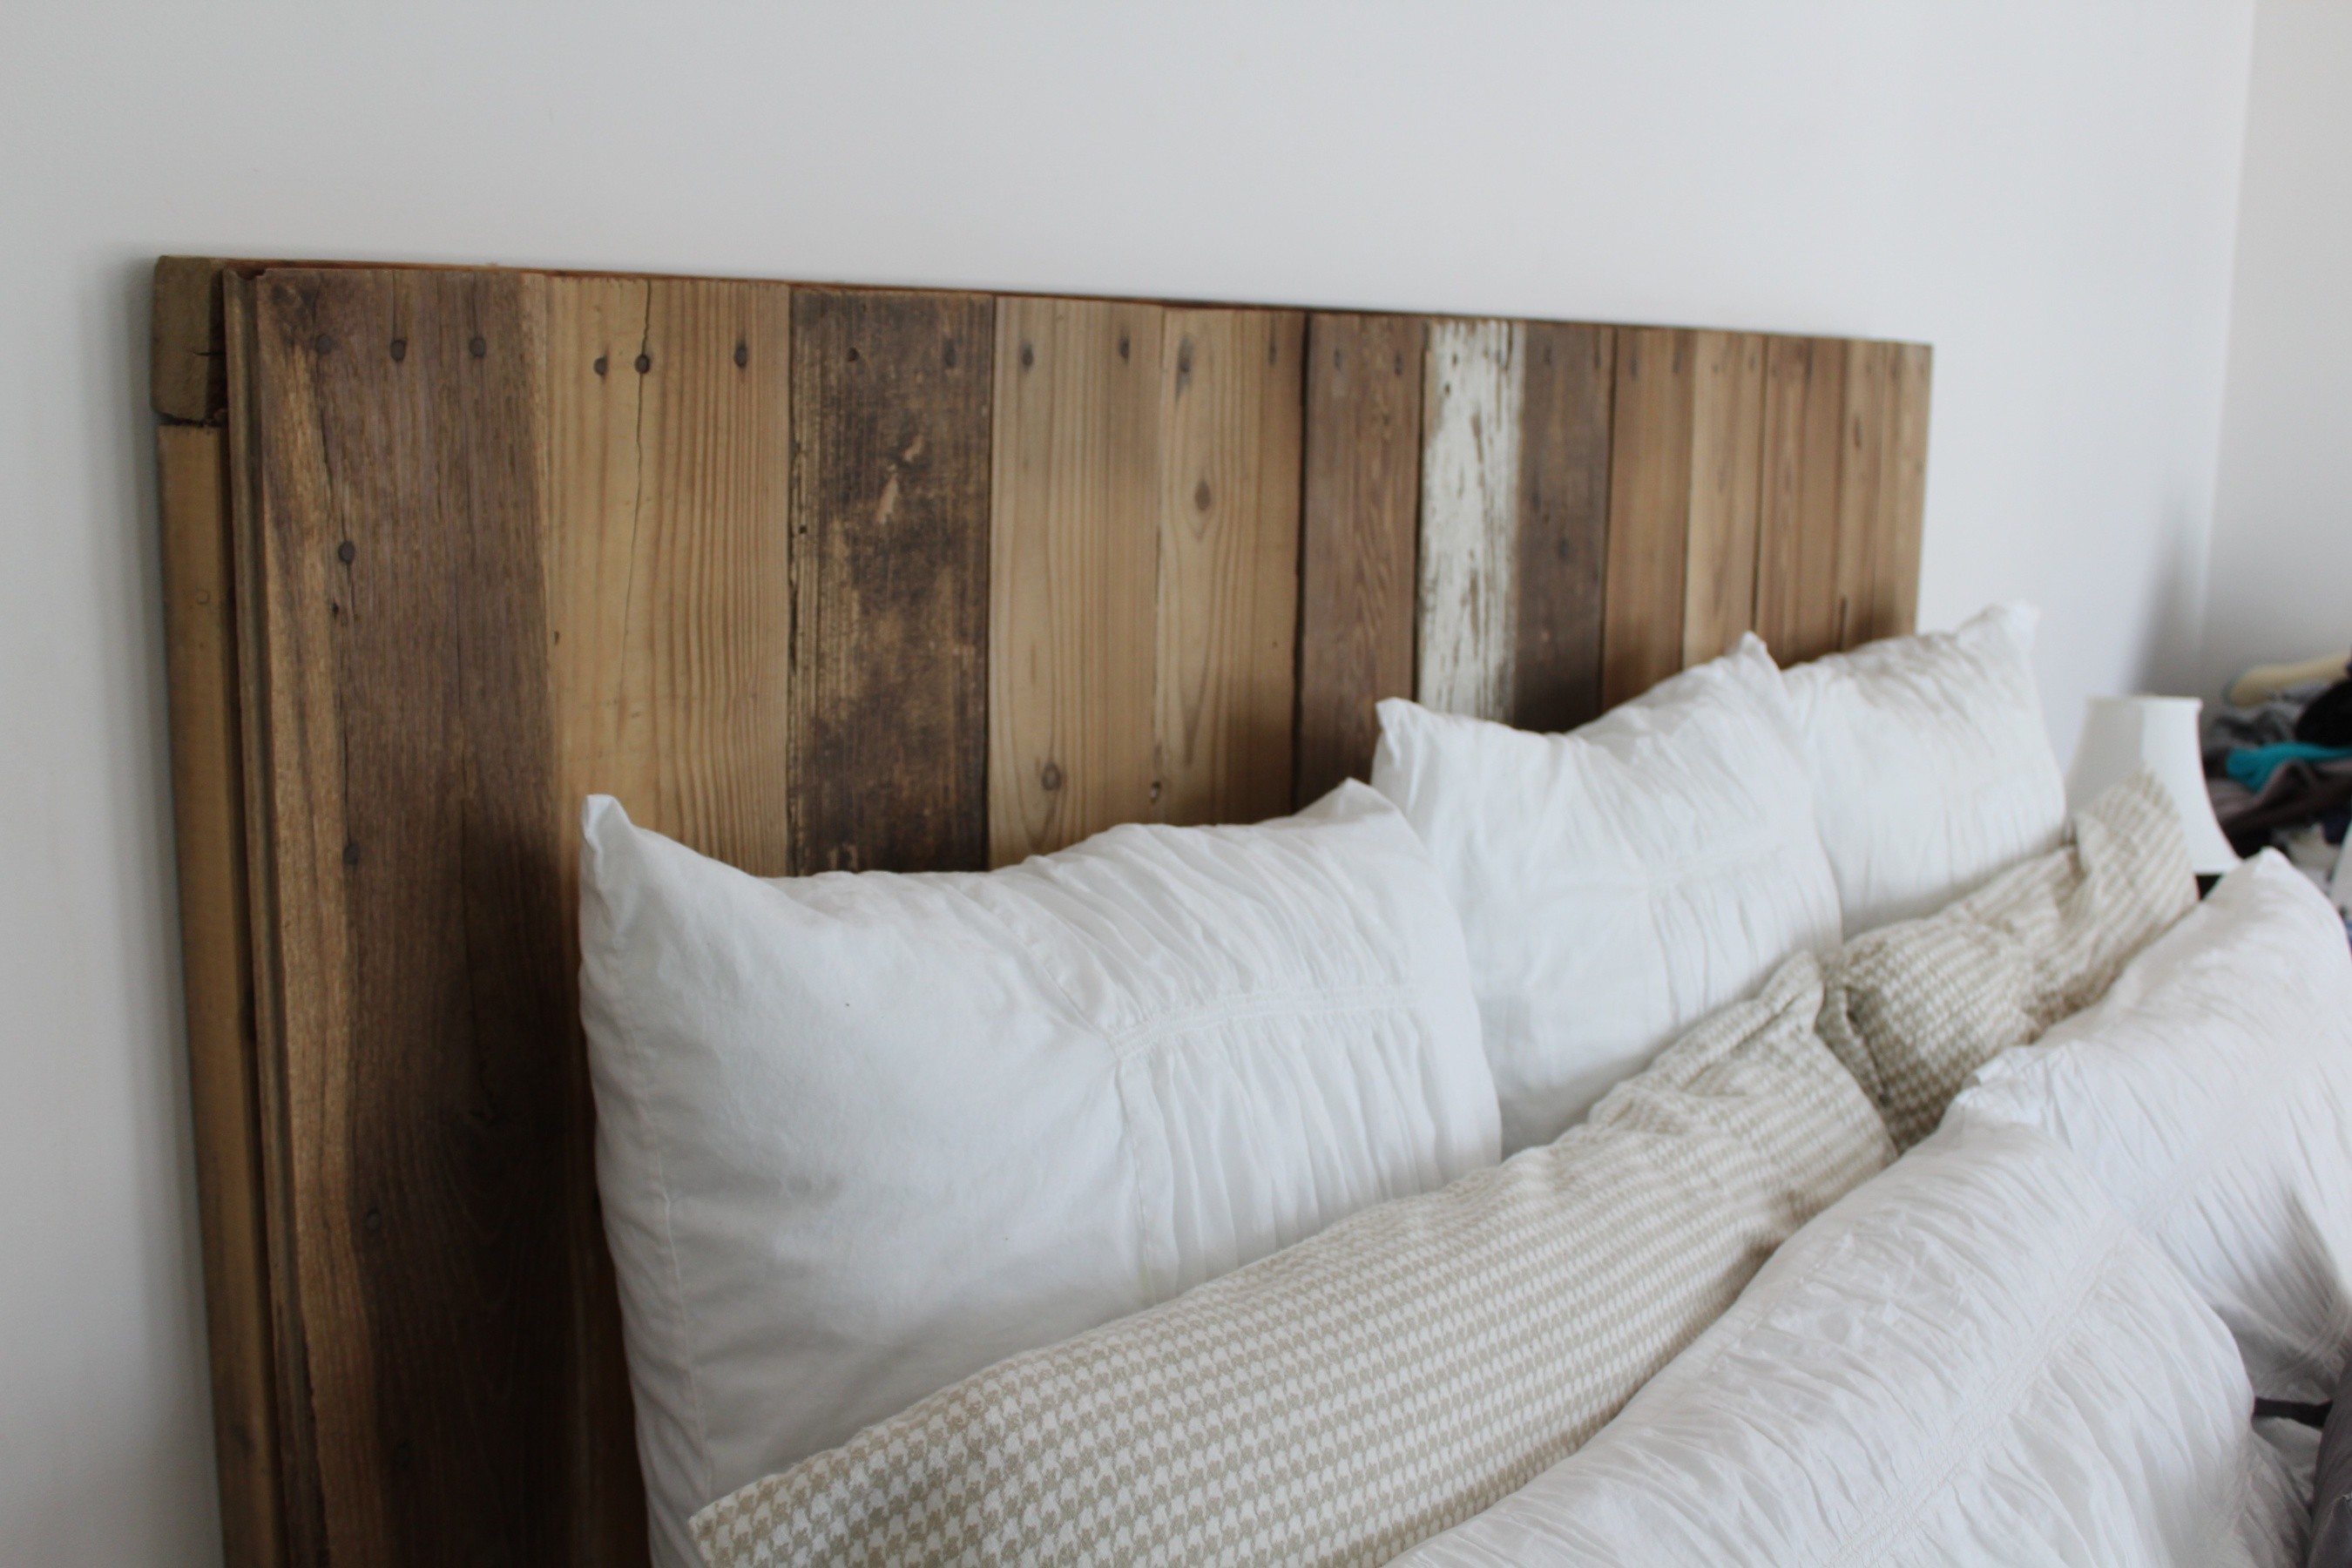
A few months ago I spotted an old door in the barn that I thought would be perfect for a headboard in our bedroom. I measured it…and yep. The perfect size. I mentioned it to the hubs and got “the nod”. Then I waited. And waited. And well, we’re busy. Things just don’t happen around here until you put the drill in your own hand. And it usually happens unplanned, while in the middle of doing dishes. And you realize the kids are busy and the baby’s napping…so why the heck not?


Well, one reason might be because it has to weigh over 100 lbs. NOT KIDDING. But I heave hoed that sucker under my arm, then on my back, and even balanced it on my head. Oh what a show the neighbors had. Eventually, I made it to the patio and thoughtfully placed it where it could not be missed.


And then the hubs realized I was serious. And well…the rest is history. Isn’t he dashing by the way? Oh how I love this guy. {swoon}


And voila! Now I feel like a true adult. I have a headboard. For the first time EVER. {insert clap of hands emoji}.


This bedroom has a long way to go though. And I know this online course thru the Nester will inspire and equip me to actually finish something for myself. AND to do it better than I would on my own!


I’m seriously SO stinking excited about this course! It’s a 4 week course called the Cozy Minimalist…you pick a room and the designer guides you thru the design process helping you to finish it off . And it’s using a lot of the stuff you already have in your home, buying new, repurposing…whatever fits in to your style and budget. SO FUN! I’m doing it with a friend, so we’re both tackling our unfinished rooms together. I’m hoping to post her room on here as well. It’s impossible to overdose on “before and afters” right?


Here are my embarrassing before photos. And it’s embarrassing because it’s stark and empty and this is supposedly my JOB people. My rooms should not look like this, I know. But I’ve refused to accessorize and move forward since I haven’t had a plan. That will be changing though!!!


You can see we’re in the process of replacing old windows. It had to be done. This place is an ice house in the winter. It was built in 1889, which basically means no insulation. Like anywhere. Can you hear my teeth chattering??? [brrrrrrr]


The dresser above I got a garage sale like 6 years ago. I was pregnant at the time so I did a quick paint job of a chocolate color, but never got around to adding pulls or finishing it correctly…which is SO me by the way. I’m going to repaint it for my bedroom redo though. And finally do it justice. Yippee!!!


And you can see the blue beaded chandelier I made for a friend’s barn style wedding reception. It was a fabulous off white at the time and hung above their head table, lit with LED’s…so charming! Ever since it’s been making appearances at baby showers and IF gatherings. And of course, it ended up in the corner of my bedroom because there was an existing hook in the ceiling…lol. Not completely thought out. But it is lovely. 🙂


And then there’s my cow chair. I took an upholstery class in college with some friends and thus the cow chair was born. It was funny…at the time people kept coming into the upholstery shop asking to buy the “cow chair”. Who knew? It’s been thru a lot all these years though. The arms and legs need some major repair. Or maybe a paint job. Hmmmm…


And how about those lamps? The one on the left is somewhat hideous…but I see potential. I’ve thought about ripping the fabric off the shade and using is as a shell for a hanging pendant. And then painting the base and maybe adding a new shade {two lights out of one!!!}. And the table it sits upon…well…not my style. But I always envisioned it as a little vanity desk for my daughter. But that’s yet another project.


And I have some work to do on these doors below. I also need to figure out what to do with the high storage above. I thought about opening them up and making a little library up there with a rolling ladder. Crazy, right? Or basket storage. Oh the possibilities…


There’s lots to do in the next four weeks! Stay tuned 🙂

IF: design & decor

I made it to my first IF gathering. I’m still meandering thru my thoughts on it all…there’s just so much to unpack. The speakers were raw and real. I felt such a sense of community and sisterhood being there with all of those women. It’s something I haven’t felt quite like that before. \

I had the privilege of helping with the decor for the event, and that was a blessing in itself. Months before a friend had asked if I’d be involved. I remember hesitating, feeling unsure of what I could bring to the table…but I’m so glad I stepped up and out of my world of crazy self doubt. We met early on at a coffee shop downtown to talk about her vision. We gobbled down our lunches and chatted and prayed and before I knew it, I couldn’t keep up with my sharpie. When our two hearts and minds came together, ideas just flowed. I was sketching and doodling and designing my little heart away. And I’m not talking about anything grandiose or over the top either. I was working with yarn and cans and sticks…{lol}. I made trips to Good Will for milk glass vases and old frames and used the old lace drapes that were in our house when we moved in. We did buy a bolt of burlap and A LOT of babys breath. But other than that, we didn’t break the bank on decorations. 


We prayed about it a lot along the way…from our first meeting to the last moments of set up. That whatever we did and however we did it…that God would be glorified. {and oh did we mean it}. We wanted God to be in it. For women to come and be blessed and feel comfortable enough to pour out their hearts to God. Not like they were at a church or a luncheon or a function {and no offense to any of those fabulous ways to commune with God either}. We were just dreaming of something else for this thing. We wanted it to be an intimate atmosphere that whispered acceptance and grace. I’m not sure how decor in any way shape or form can do that…but I truly believe that when God is “in” something…when He shows up…it can come alive. And OH DID IT. Thank.you.Lord.

***

The concept: Create a simple and elegant atmosphere using a collection of all things rustic and natural. 
{old wood boards, cans, twine, green and cream yarn, chunks of wood, lace, burlap, twigs, string lights, metal buckets, simple milk glass vases}

***

Here was the beginnings of our string art sign. It was sort of the basis of the our whole design concept. Lyndseye’s handy hubby built the pallet substrate for us. You can see my little helper there in the corner. He wanted to rip the paper and eat the nails. Eventually he ended up in baby jail. {aka the jumper}

I made a template on the computer so that I wouldn’t have to measure out the nail locations. I didn’t have time for that, and this sign was pretty big as it was. I’ve discovered that when I work, it has to be quick. Like lighting fast. The little people require snacks and hugs and tickles every 15 minutes. So sending a drawing to the local print place is just easier for me. It might be because I spent years in a design firm and that’s the language I speak. However you slice it, this little template made nailing my 3 foot “I” and “F” cake.

This next image might help you understand WHY I can only work in 15 minutes increments. This is what my 4 year old did while I nailed the pattern down. I was working on project IF, he was working on project TENT DISASTER. You can see he’s in mid jump here. Probably testing out the strength of his tent roof. {sigh…}

I tore the paper off after all the nails were in. It probably took me an hour to do the nails and the yarn. Easy peasey.

My dad even joined in on the action. He followed me thru our woods one cold afternoon and heave-hoed all the down branches and logs that fit the size and shape of my liking {what a sweet dad}. Then he even pulled out the saw and cut them in random lengths for me. I truly heart him.

I also got a little crazy and cut up old lace curtains and used them for table runners. Our original idea was to use chicken wire as a layer over the lace {it looked AMAZING) but it was just too hard to work with in the end. It wouldn’t lay flat and I didn’t have the patience to deal with all the sharp edges. We ended up layering a strip of black tule over the lace to get the same contrasting effect. Much easier, and still pretty I guess.


This “angel” puzzle was in one of the old frames I bought from Good Will … I thought it was fitting that it ended up being the straight edge I used to cut the lace against. God was in the details, like literally. But we knew that with or without an angel straight edge 🙂

I also made two large coffee filter wreaths. I decided to dye the coffee filters light gray by soaking them in a mixture of water and black paint for a few minutes. We laid them out on tables in front of space heaters to dry. Like I always say…whatever works, people! It was somewhat time consuming gluing them all together, but mainly because I was sort of OCD about bunching them together as close as possible. I used over 1000 coffee filters in the end. Thank goodness Aldi sells them cheap!

My son Rigby wanted to be in the photo below since he helped. He stayed up late one night with me separating all the filters. I heart him too 🙂 Who asks to be in a photo and then refuses to look at the camera??? I think I better pause here and apologize for jumping back and forth between serious design and sarcasm. Please know it cannot be helped. 😉

Since we wanted to atmosphere to be cozy and intimate, we surrounded the tables with walls of pipe and drape, basically pulling the walls of our sanctuary in. And by “we” I mean Tom…the amazing facilities guy at our church. He offered up a lot of suggestions and really helped us get everything just right.

We also used long runs of tables end to end so that it had more of a community feel. I think it helped us feel like we were all part of this thing together. Quaint and cozy, and well, just plain lovely.

And we can’t forget this little man. I know he was helping his Momma behind the scenes as well 🙂

And here she is…Miss Lyndsye…our IF coordinator extraordinaire! We had so much fun working together on this. Seriously. I swear we were finishing each other’s sentences by the end. We even accidentally wore matching shirts to set up…”twinning” as Lyn put it. So fun!

***

And finally we were ready for IF:Valpo

***

(photo credits to Liz Bradley and Jerry Grafton)

mops centerpieces

My friend Jen and I made these little beauties a few months ago for MOPS.

Aren’t they just lovely?

We used a mix of pheasant feathers, wheat grass, burlap, chunks of wood, twine, and narrow vases. All of my favorite things. Our vision was neutral and rustic, with a bit of whimsy. Oh, and cheap. 😉 I think we nailed it.

Each table has a different name, inspired by our MOPS theme of “Be You Bravely”. Words like…confident, daring, fearless, indomitable (Jen…she’s the vocab queen), courageous, adventurous, and resolute.

*photos by the fabulous Liz Bradley